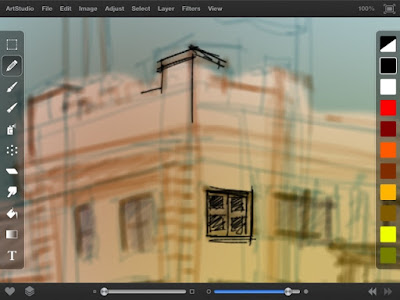
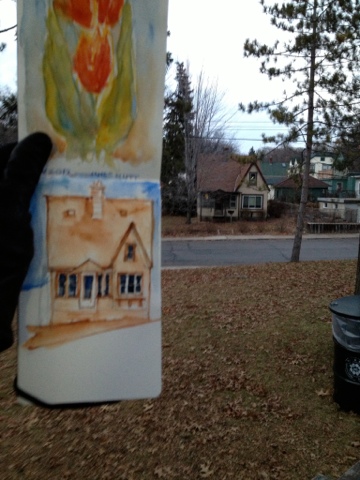
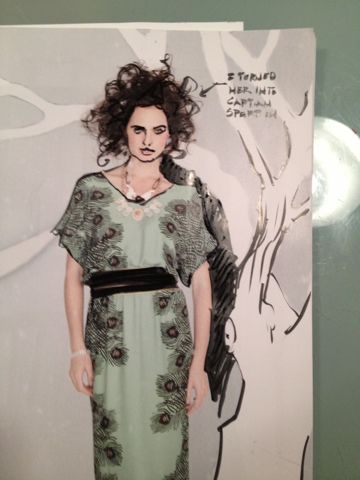
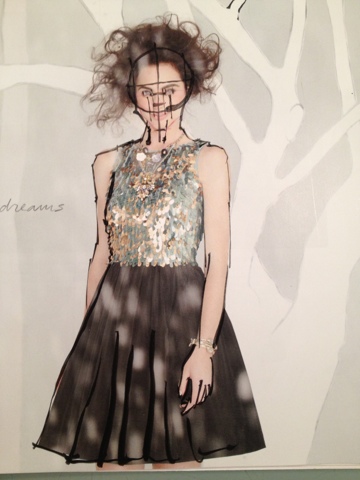
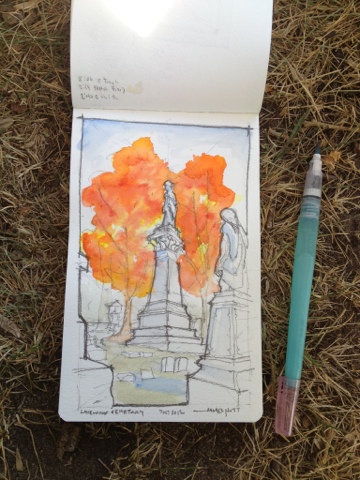
I will add more later, but today I took my lunch in the car and started drawing the current white bear center for the arts thinking how to teach the class. This is not close to finished, and the drawing hasn't even convinced me it is keeper, but it is a good teacher....warts and all. These are chronological screen shots and might give a hint to my process.
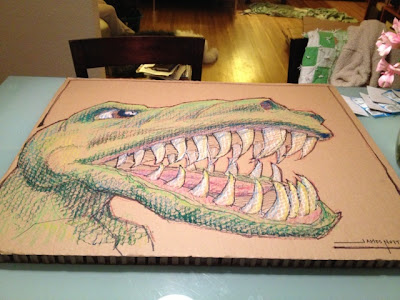
T Rex!
Fun with big cardboard
San Diego Sketches
San Diego Sketches
A recent trip to San Diego allowed some free time to do sketches. I was with the talented Adam Jarvi on a survey run. We wandered around the Gas Lamp District and a very large concrete pier. I grabbed a few sketches along the way while he did some wonderful photography. He took the two shots of me sketching below.
San Diego is a really wonderful place. The weather was amazing and the people watching even better!
James Nutt
Ice House, Eli's North, and before Church sketches
I am working pretty hard on learning to draw people on site and quickly.
This sketch is from earlier last week at the Ice House watching one of the JT Bates bands with Will Jensen. This was drawn and painted in the dark, so you never know what you are going to get.
Unfortunatley on the second sketch I was sketching JT (it was dark is my excuse) and the drummer from Ahmad Jamal at the Dakota showed up in the sketch!
Two sketches on one sheet. People study in the downtown Caribou Coffee outside the government center waiting for the zoning board of adjustment to start and the second is a quick sketch after the meeting at the newer Eli's North just across the bridge.
I am working pretty hard on drawing people lately and I am always a little delighted with who shows up on the page. Sometimes it is even the person I am drawing!
The rest of these are people studies. I have free time before church and I sketch while we are having breakfast. You can see Leo's drawing of Darth Vader (Angry Birds version of course) on one of the sheets.
Happy Sketching everyone! Where ever, whenever... with whatever....
James Nutt
Travelling in Fort Worth Texas - People Studies
Travelling Solo in Fort Worth
A great part of my job as an architect is to travel and do building survey's or to get building permits etc. These are quick trips, usually solo or one other person with free time in the day or evening to wander interesting places. Recently I went to Fort Worth. I was downtown and no car, but a great city to walk in. I am on a mission to get better at people, so on this trip I gave myself a challenge to draw 30 people. An airplane technical problem and extended stay helped make this possible!

I would wander around my area, find a discreet place where I can see but not be overly seen, pretend I am drawing the room and try to catch expressions.
The watercolor and sometimes gouache was added with my tin kit onsite
The convention center is basically a big concrete spaceship with a beautiful park next door. This is a pretty rare sketching opportunity and I enjoyed it.
The bottom sketch is in a very very dark jazz venue calle the Scat Club. I was basically drawing by one of those little yellow battery powered candles so the quality of sketch and color was anyones guess while doing it.
In the airport there was a group of young Japanese guys. Some were wearing the white air filter masks and one bought a very white cowboy hat. I just had to draw that!
I thought I would share the journey!
James Nutt- Minneapolis
Merry Christmas Everyone
A day of sketching in Philadelphia
I took an extra day in Philly to wander and sketch. Great city. I had a nice time. Patrick Stinger and his wife gave me a general layout of things to sketch. I roughly followed their direction. I started in the Italian Market with a great cup of coffee and salami as I found a stoop to sketch from. I got to have a lot of conversations with kids.
This sketch was actually the first stop, if only because we spent the previous evening at the Pope's Pub and I wanted to get a sketch. The first one was from the car. The second was from a photograph later in the airport while I could still remember it.
This sketch was actually the first stop, if only because we spent the previous evening at the Pope's Pub and I wanted to get a sketch. The first one was from the car. The second was from a photograph later in the airport while I could still remember it.
The last stop after wandering randomly around the city was the Barnes Museum. Really beautiful building, but I had a hard time getting a painting I was happy with. I was determined to go abstract without lifework. However, that didn't seem to be in the cards so I did as best I could and loosely sketched over it.
Got to the airport at 4pm. finished the second Pope's Pub sketch and finished off a great day.
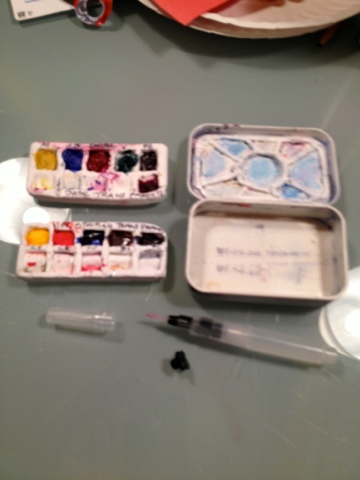
Altoids paint kit 3 "The brush"
It took forever to find this little brush, but Liz at Wet Paint came through for me. And now they carry them! Thanks!
"Koi water brush". I don't really see a model but the numbers "xqr" and the numbers 38552 and 4ml large are on the pack. These come in three sizes but I have only played with the medium.
I love it and Perfect for what they do and the size, but my critique is they are a lot harder to squeeze and don't have the water control of the larger sizes. Easy trade off for portability, but planned sketch day would benefit from the larger brushes. The water cartridge travels really well, but be warned it doesn't hold a ton.
Now with my Altoid kit and a rubber band holding a paper towel I have had a blast being able to paint with (almost) as much portability as a pencil (almost, but certainly more colorful)
A weekends worth of sketching
Nothing special about the weekend except I really felt like sketching and had my small kit with me.
A quick sketch at Sporty's Bar (A dive bar of epic proportion in a good way) waiting for a friend to show up. Given this was done in poor lighting I think it came out ok. Mostly practicing people and watercolor with a prelim sketch.
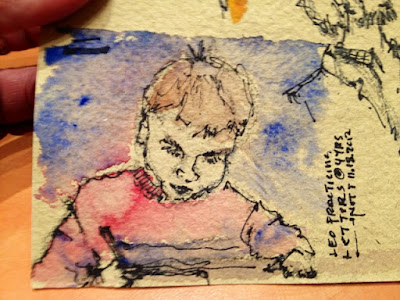
Before church drawing my son in the Westminster Library and people in the coffee shop. My people are actually starting to look like the people.
In the NE Coffee Shop we all three went hung out for a while and I did a rough abstract of the flowers at the table.
Later that day, painting while Leo played in the park. Once again, trying to draw more with paint, although I did do a light sketch of the major parts and proportions. I simply ran out of time on this one. It was fun and I have decided for an architect, I don't sketch enough houses and buildings.
A quick sketch at Sporty's Bar (A dive bar of epic proportion in a good way) waiting for a friend to show up. Given this was done in poor lighting I think it came out ok. Mostly practicing people and watercolor with a prelim sketch.
Before church drawing my son in the Westminster Library and people in the coffee shop. My people are actually starting to look like the people.
In the NE Coffee Shop we all three went hung out for a while and I did a rough abstract of the flowers at the table.
Altoids paint kit part 2
Practicing faces and figures
"Altoid" portable water color tin process
A road test tray and 3 news ones
A cold but perfect morning. Waking up before the sun on a Men's retreat to paint and think.
I have been on a journey to create my version of the perfect pocket tin water color set. I have really enjoyed the journey and thought I would share it.
I admit I have really enjoyed researching what others have done. I want to give credit where credit is due and admit that like any good blues song I have blatantly stole, combined, riffed on, maybe added something.... The ranges go from not painting the tin and rubber cementing trays and half trays, to using sculpey clay, to very elaborate. I didn't mean for my process to go the involved route, but hey, when you are having fun and find you can make exactly what you are looking for.....
I have always used a half pan Winsor & Newton Cotman Watercolor - Compact Set and I have always done the urban sketchers type of on site painting. My wife taught me to paint in Rome while there during architecture school and I have used this kit ever since.
Iphone process photo from the Metro Sketchers outing at the state fair this year. Yes that is the arts building. (perhaps one day I will have something in there?)
There are things I love about this kit. Including the memories with using it. But I wish it was smaller and honestly, since I didn't create the color palate, I didn't really know how to use most of the color. I have been on a concurrent crusade to understand color while making this kit and the color choices used in the tins will reflect that, but more on color later. But honestly, this cost me 30 or so bucks in 1998 and I have sooo enjoyed it and still will.
On to the making
The Tins
Like I said, I did a lot of thinking first and a lot of research. I decided I wanted the following:
1. I wanted to go the sculpey clay route (moldable clay you bake for 30 min - pretty cheap - about 7 bucks worth made about 4 trays for me)
2. I wanted to paint the tins so I didn't deal with rust and I wanted a white mixing backdrop.
3. I wanted to steal an idea I saw using bathroom caulk to make mixing trays on the lid.
4. I wanted to make one large tin and one small tin.
And during the process this is where it clicked....This is when I started to get excited. This is where I answered the question...why not just buy the little KOI kit (that comes with the little water brush I couldn't find and seems like a great kit.)
5. Once I started making the sculpey trays I decided I would enjoy being able to take them out and use both surfaces of the tin to mix with.
Then I realized I could reasonably stack two trays in one tin.
Now we are making something we can't buy...I am in....
Then I realized I could reasonably stack two trays in one tin.
Now we are making something we can't buy...I am in....
THE TINS
Altoids have become the household name for these tins, BUT they started embossing the logo into the lid. So I found a Newman's own brand that had a flat top. I bought a large and a small. I have played with these for hours, but still haven't gotten through all of the mints!
To Start
Prepping the Tins. Following other's advice I :
1. Thoroughly washed the tins
2. Bought some (Walmart) white appliance paint
3. Heated the tins up to 200 or so degrees
4. Put them in a shoe box
5. And spray painted the crap out of them. I was surprised that even with doing multiple small coats the original color still sneaked through. The lesson here is to use more paint than you think you need.
The Clay
I bought the super premo white sculpey from Dick Blick. I bought two small packs and it was enough plus a little to do everything you see here. My sculpting is rough, but I love the experimental phase. I learned a little about warping too, but more on that toward the middle of the process.
I started thinking I would use the entire bottom of the tray. I used the half pans from my cotman kit as a starting point.
Then I realized half the tin was all that I needed and I would still have space for my brushes and pencil. In the beginning I was going for tight fit, but removable for cleaning. Now I go for ease of taking in and out of the tin.
At this point I had decided to cut the tin in half. Next I started cutting in the half trays from my kit. I decided not to use the trays. I just use them for the shape and then fill with tube paint. I dries well enough to travel within a couple of hours. Hasn't been a problem, and this first kit even survived me dumping a Kayak with this kit in my pocket.
BTW, I think all the oil from the clay may have made my paint more prone to water color (especially blue) staining. I have made several trays but not new tins to see if this is true or not.
On the lid and the small tin I used the caulk trick to separate mixing trays and make the paint wells on the smaller tin. I used a regular full size caulk gun. This was much more difficult to make even close to pretty and I had to form it with a paint knife quite a bit. I think a smaller tube of caulk would make this much easier. Going though old car model stuff lately I found a putty they use to build stuff up. This tube I have is over 20 years old, but I think I will see if it is still good on the next round.
The finished and baked tray. Notice how thick the sides are? This one did not warp. My later ones were smaller and did warp a bit. The warping is fine except it makes is thicker for no good reason so closing the lid becomes hard now. Symmetry about the sides is the key.
The finished tray - both "large" and small.
Now to load them up with color. Inspiration to me Cathy Johnson has a wonderful blog, and information specifically about this. She was smarter and took the simpler approach, but she does talk alot about limited color choices and I used that model. She has two approaches and they are both represented here.
NOW TO TEST DRIVE.
Test drive at home....
Test drive in the field
And test drive at the kitchen table (My Inlaws in Bella Vista Arkansas doing a study of an amazing national steel guitar)
At the coffee shop (Mauve's in NE Minneapolis)
So...As I said, now I am making something I can't buy....AND I HAVE CLAY LEFT OVER....and I have played with it awhile.
I have thought alot about mixing space and in a small working area how to keep you colors clean. I have been thinking about sloped paint wells where the pure stuff stays up top, and you can play with color mixtures down below. I had a couple of ideas and roughed them out. I started the same way as before, using the half pan from my cotman kit to space things out, but started carving from there.
progress shots.....
This tray has a single slope
This tray has a double slope
After baking the first two warped a little. I wasn't careful about keeping a consistent edge
After baking
...So on the third one I added a small skillet during cooking to make
it flat. I underestimated the weight and the heat, but it is still
usable and has this cool impression on the back...but it is a bit
squished...BUT STILL USABLE!
My new arsenal
I have only test driven these in at my table so far
I have loaded these up based on distinctions made in "Making color sing" seperated by transparents, vivid staining, and very opaque. For now this is working for me and I use a sharpie to give the same abbeviations for the studies. I know that I will change this arrangement later on with a little soap and hot water...
This blog entry is long enough. I want to talk about color choices and the pen brushes on later post.
I hope this helps and maybe I have added to the great conversation. I am certainly enjoying my custom kit.
Metro Sketchers - Lakewood Cemetery sketch out
Fall colors
The Pumpkin Process..maybe too much process
I started yesterday morning in my mens group (my turn to lead) getting people to draw and preached my allegiance to proportion so I thought I would show it in a way I typically just incorporate (vs put it in red pencil)
The first sketch out. I have been drawing this same pumpkin in my study of "making colors sing" for the past few weeks. The pumpkin should be glad because squirrels have taken 3 bites and then left every other pumpkin in our garden.
Working out the shadows given two light sources
Finish the sketch, then the tough part, getting this onto the watercolor paper. This sketch was done on trace paper, the next step is to sketch under the trace paper while holding it in place. Kind of clumsy but it works well enough with touch up.
The under trace and the trace sketch. I really like the trace sketch and may keep it.
Time to touch up the undertrace on the real paper
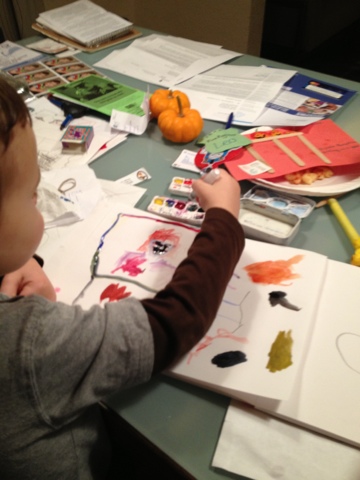
I have to include my buddy who is drawing beside me. Way past his bed time, but if he is drawing with me...I will break the rules a little! He is quite good, but both parents draw all the time in front of him.
Wook it Daddy!
The best part of Leo's sketches is that they come with a story. A great story
And it gets pretty elaborate. Plus, I need to burn time while my paint dries
I did the yellow first because I read that yellow afterwards muddies things. On teh dry parts I started to use blue. The point is undertones that will be knocked down by cadmium orange later. Cadmium Orange has two advantages. The rest of this palate is really transparent and it is a very opaque, plus it happens to the the exact color of my pumpkin!
Working on the shadows on my green glass table
I cheated and added transparent yellow because it middle ground the yellow and eventual orange. Everyone seems to love transparent orange. I now know why. I squeezes out as mustard ochre but with water becomes the exact color of a good beer (say a Boddingtons) anyway I thought is would be a good bridge to the last step
Working it more and showing the model
Alittle more shadow work
Adding the Cad Orange in layers
A semi wet finished product. I have learned I need to wait a few hours for the final and nice things happen as the paint settles out and makes friends. I will take a final picture tomorrow for the final.
I am really enjoying the making colors sing palate.
Tough day, fun night of painting. During this project I fed a kid, loaded and unloaded a dishwasher, watched the news, cleaned a kitchen, paid bills. Some decent multitasking if I do say so myself.
Sketching at Clear water
Sketching at Clear Water
I am reminded of one older (although it is so fresh in mind I can't believe it was 2002) sketch from Still Water, MN and couple from North of the Twin Cities a few weekends ago on a Men's retreat at Clear Water Presbyterian camp. I have gone every year and always try to draw as much as I can. This year I did get a few in that I was proud of.
I woke up before the sun and set up my drawing kit. This was a great way to start the day.
 Group Discussion
 Some of my favorite Minneapolis sketches
I
recently joined Twin Cities Urban Sketchers website and it reminded me of some
of my favorite Minneapolis sketches. For a while I would try to sketch at
lunch. Mostly small and quick.
-->
The
absolute best seat in the house to sketch that I know of the second floor of
the Barnes and Noble. I had many successful and unsuccessful sketches
here.
-->
The
amazing Bob's Java Hut. I drew this waiting to talk with Mike Janasz way back
when.
One
of many many many cold bus rides
I
loved sketching Gavidee commons. It is a little busy for my taste but the
details are truly thought out. It also struck me how much the proportions
are similar to a church.
-->
I
was design architect For Cristo Rey Jesuit High School and the Colin Powell
Leadership Center. I believe this was graduation and I stepped back for a quick
5 minute sketch. What an amazing project helping at risk kids.
I took my birthday off and roamed and sketched. At the time this building was about to close. I think there has to be money to keep these great churches up. The hold so much memory and are such a part of the skyline. I know that it was bought because on the Zoning Board of Adjustments we approved a variance for temp screening for air conditioning.
-->
Waiting
for the bus on day. I love this building. The floors are literally hung on a
cantenary curve that you can see in the facade. This is a building
we studied in school.
Also, I have been on a mission to capture people better. The first
sketch of the guy introducing the band is my favorite so far. I showed it too him. He said he had been sketched many times but he thought this captured him the best. Especially the beard.
A you can see I was really enjoyed sketching the shape of the stand up base. The second sketch leaves out some of the band but my favorite part is watching these two brothers work together.
This last sketch was of the saxophonist and the bass working together. The tune is "my leg is bouncy" and my sketch should have caught more of that!
Any way, sketching in a dark club is a lot of fun and I enjoyed it.
Metro Sketchers MN State Fair Sketchout!
Thanks to everyone for setting this up. This was my kind of day off. State fair, by myself, with the intent of drawing. And drawing I did. The meeting at 4:30 was great to meet and see all the great work. Check out this site for posts from the group - http://urbansketchers-twincities.blogspot.com/ and http://urbansketchers-midwest.blogspot.com/.
I got 7-8 good sketches in and took lots of progress shots. I will do a blog post on each individually with the progress shots and the story, but for now, these are the finished product.

I got 7-8 good sketches in and took lots of progress shots. I will do a blog post on each individually with the progress shots and the story, but for now, these are the finished product.

